The Filteroo® Joey 12L Gravity Ceramic Water Filter is designed to give you purified drinking water while keeping the healthy minerals your body needs. Handcrafted from high-quality stoneware and paired with some of the best filtration cartridges available, it delivers a slow, thorough filtration process without the need for electricity or plumbing. Plus, its sleek, kiln-fired design makes it more than just a filter—it’s a statement piece for your home.
In this guide, we’ll walk you through setting up your Filteroo® Joey so you can start enjoying fresh, purified water in no time. Let’s get started!
Watch our guide videos/instructions by clicking on the links below:
How to Assemble Your Filteroo Joey Gravity Water Filter
How to Install & Flush 8” Filteroo® Rain & City Water Gravity Carbon Block Filter Cartridge
How to Setup Your Filteroo® ULTRAPURE 7" All in 1 Ceramic Gravity Water Filtration Candle
Frequently Asked Questions (FAQ)
How to Assemble Your Filteroo Joey Gravity Water Filter
Set up your Filteroo® Joey Gravity Water Filter with this step-by-step guide. Learn how to assemble, prime, and install your filter to ensure clean, great-tasting water. Watch the full video for detailed instructions.
Welcome to your guide on how to assemble the Filteroo® Joey gravity water filter! This step-by-step process will help you get your filter ready for that refreshing glass of filtered water in no time. In just about ten minutes, you can have everything set up and ready to go. Let’s dive into the assembly process!
Table of Contents
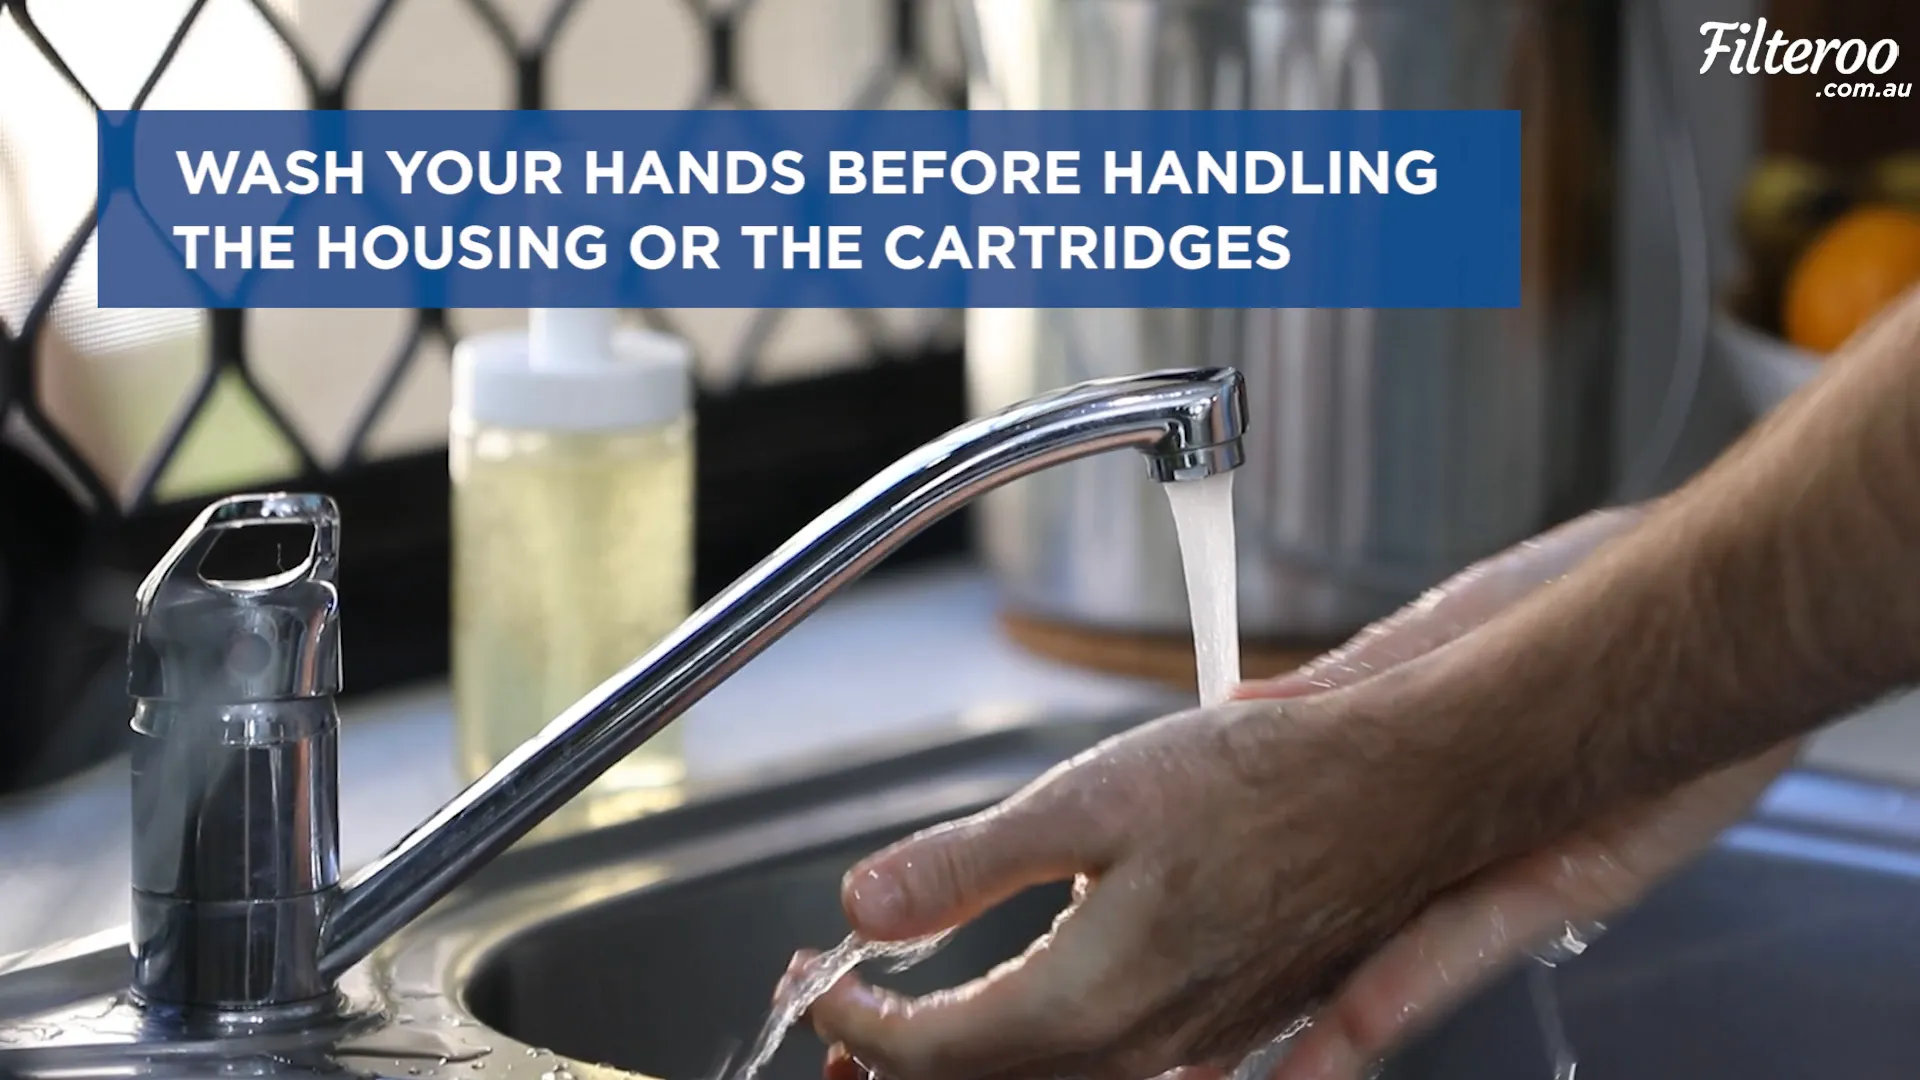
Step 1: Cleanliness is Key
Step 2: Inspect Your Components
Step 3: Washing the Parts
Step 4: Position the Base
Step 5: Prime Your Cartridges
Step 6: Installing the Cartridges
Step 7: Lower the Top Tank
Step 8: Flushing Your Filter
Step 9: Fill and Enjoy!
Step 1: Cleanliness is Key
Before we dive into assembling your Filteroo® Joey, let’s start with the most important step—keeping everything clean. Your hands carry natural oils that could affect the filter’s performance, so give them a quick wash before handling any of the parts, especially the cartridges. A little care here goes a long way in ensuring your water stays pure.
Step 2: Inspect Your Components
Once you've washed your hands, it’s time to unpack your Filteroo®. Carefully remove everything from the box and inspect all components. Ensure that they have arrived in good condition and are ready for assembly. If you notice any breakages or missing parts, don’t hesitate to contact us immediately for assistance with replacements.

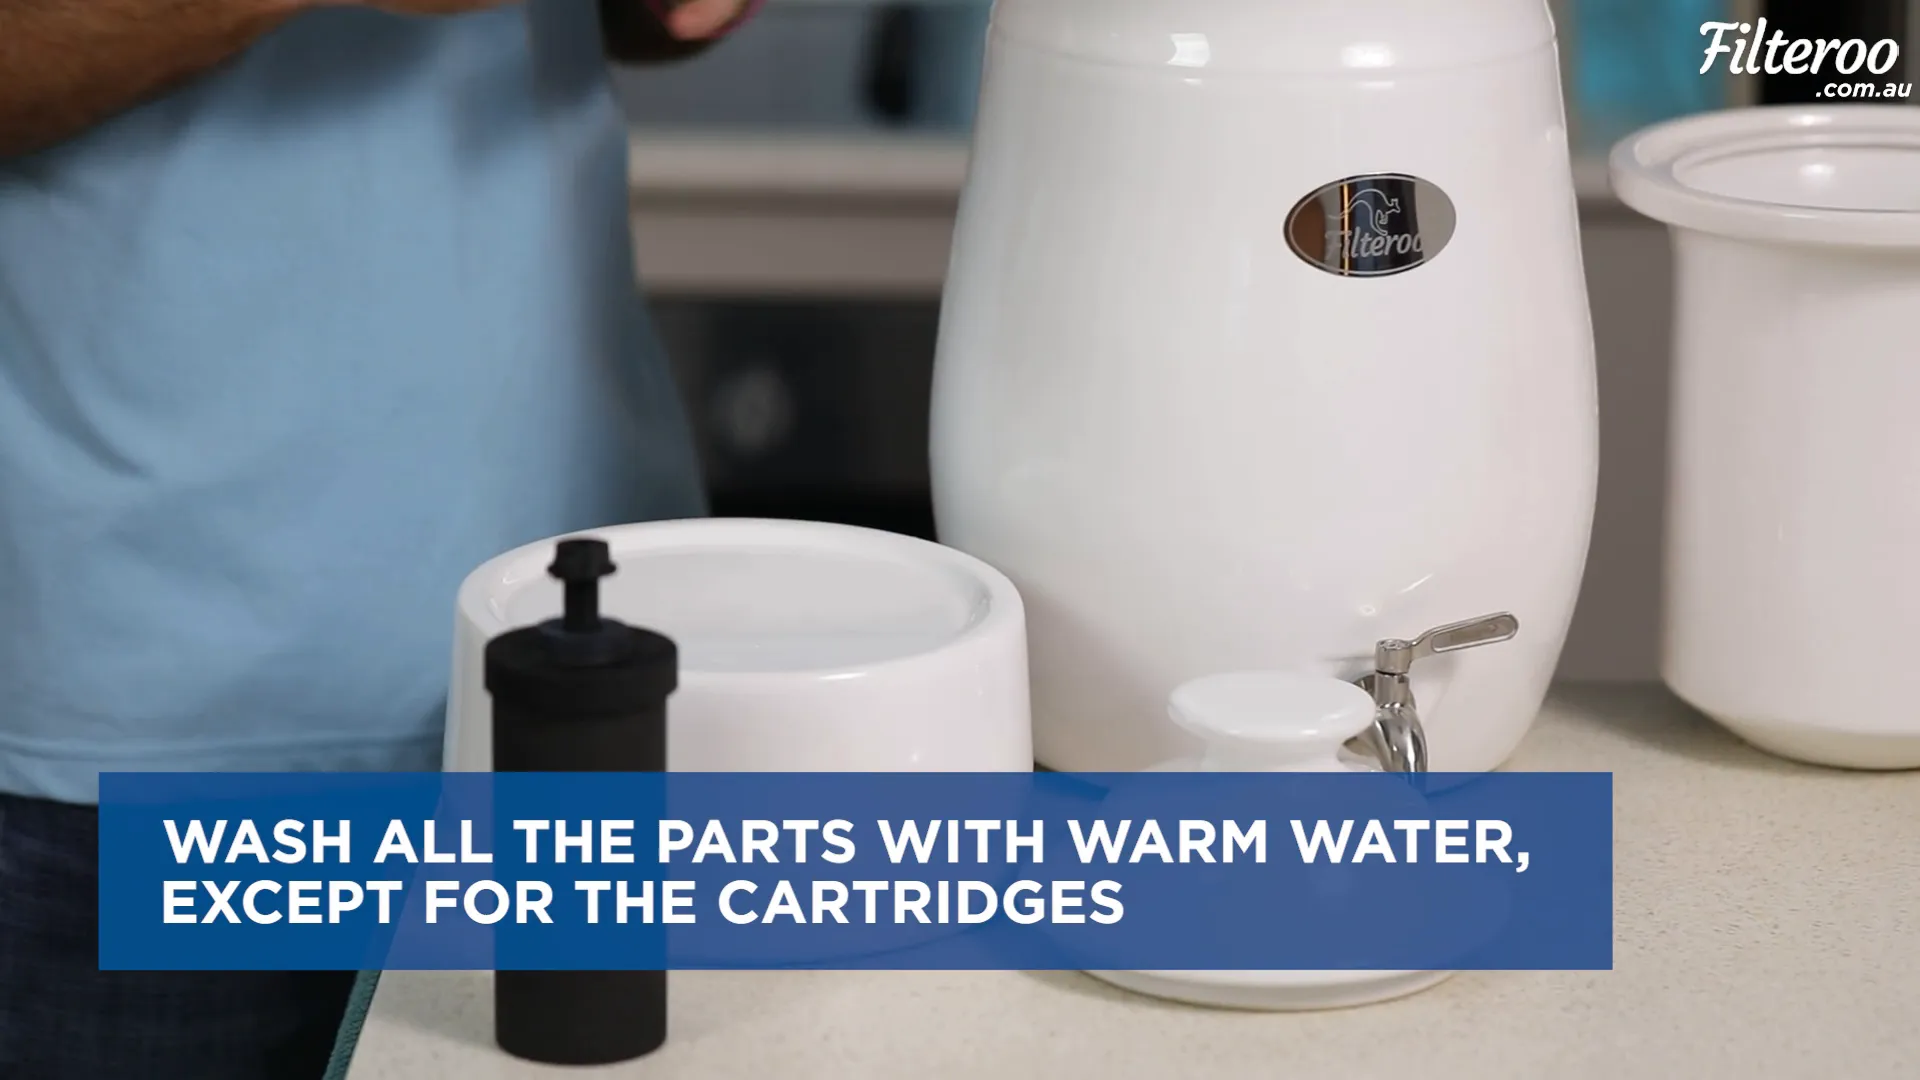
Step 3: Washing the Parts
Next, you’ll want to wash all the parts, except for the cartridges. Use warm water and a light dishwashing liquid to clean the lid, the top and bottom tanks, and the tap. After washing, lightly dry these parts and place them on a flat surface on your countertop to avoid any rolling or falling.
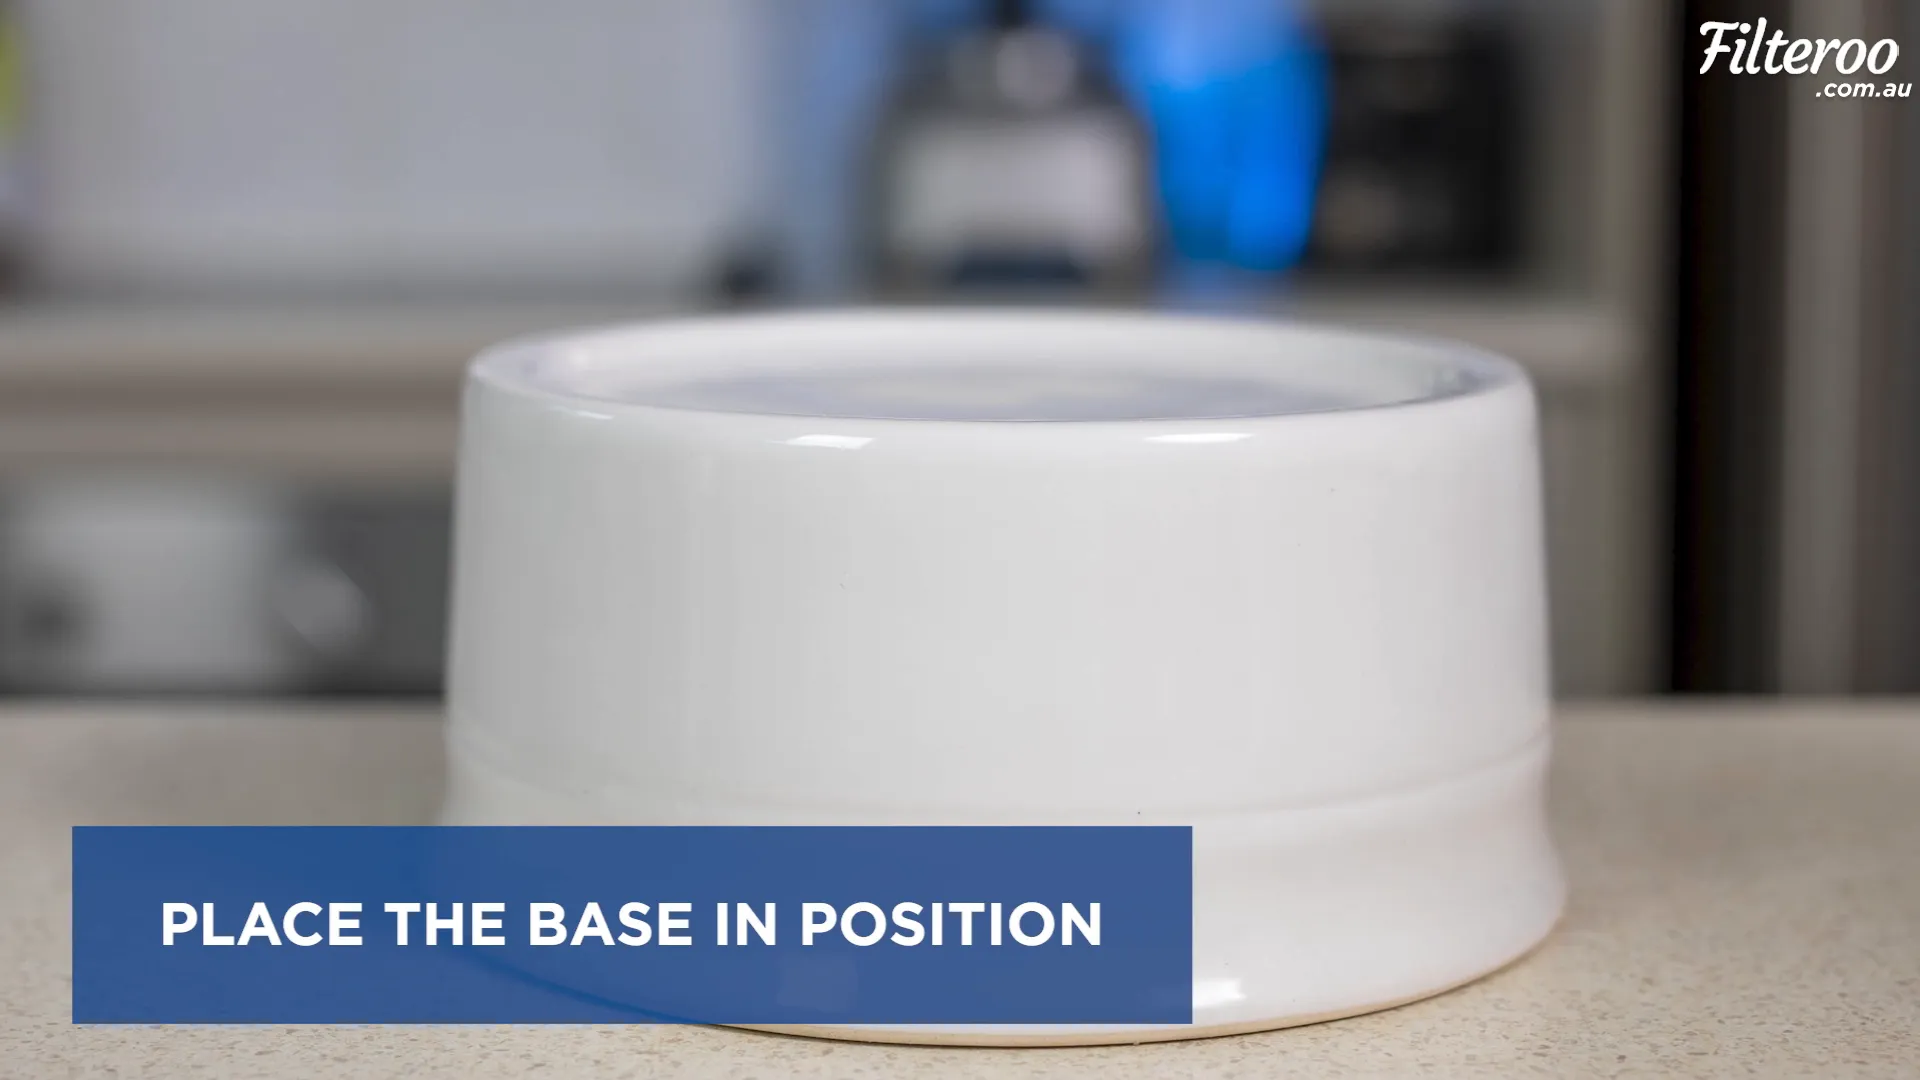
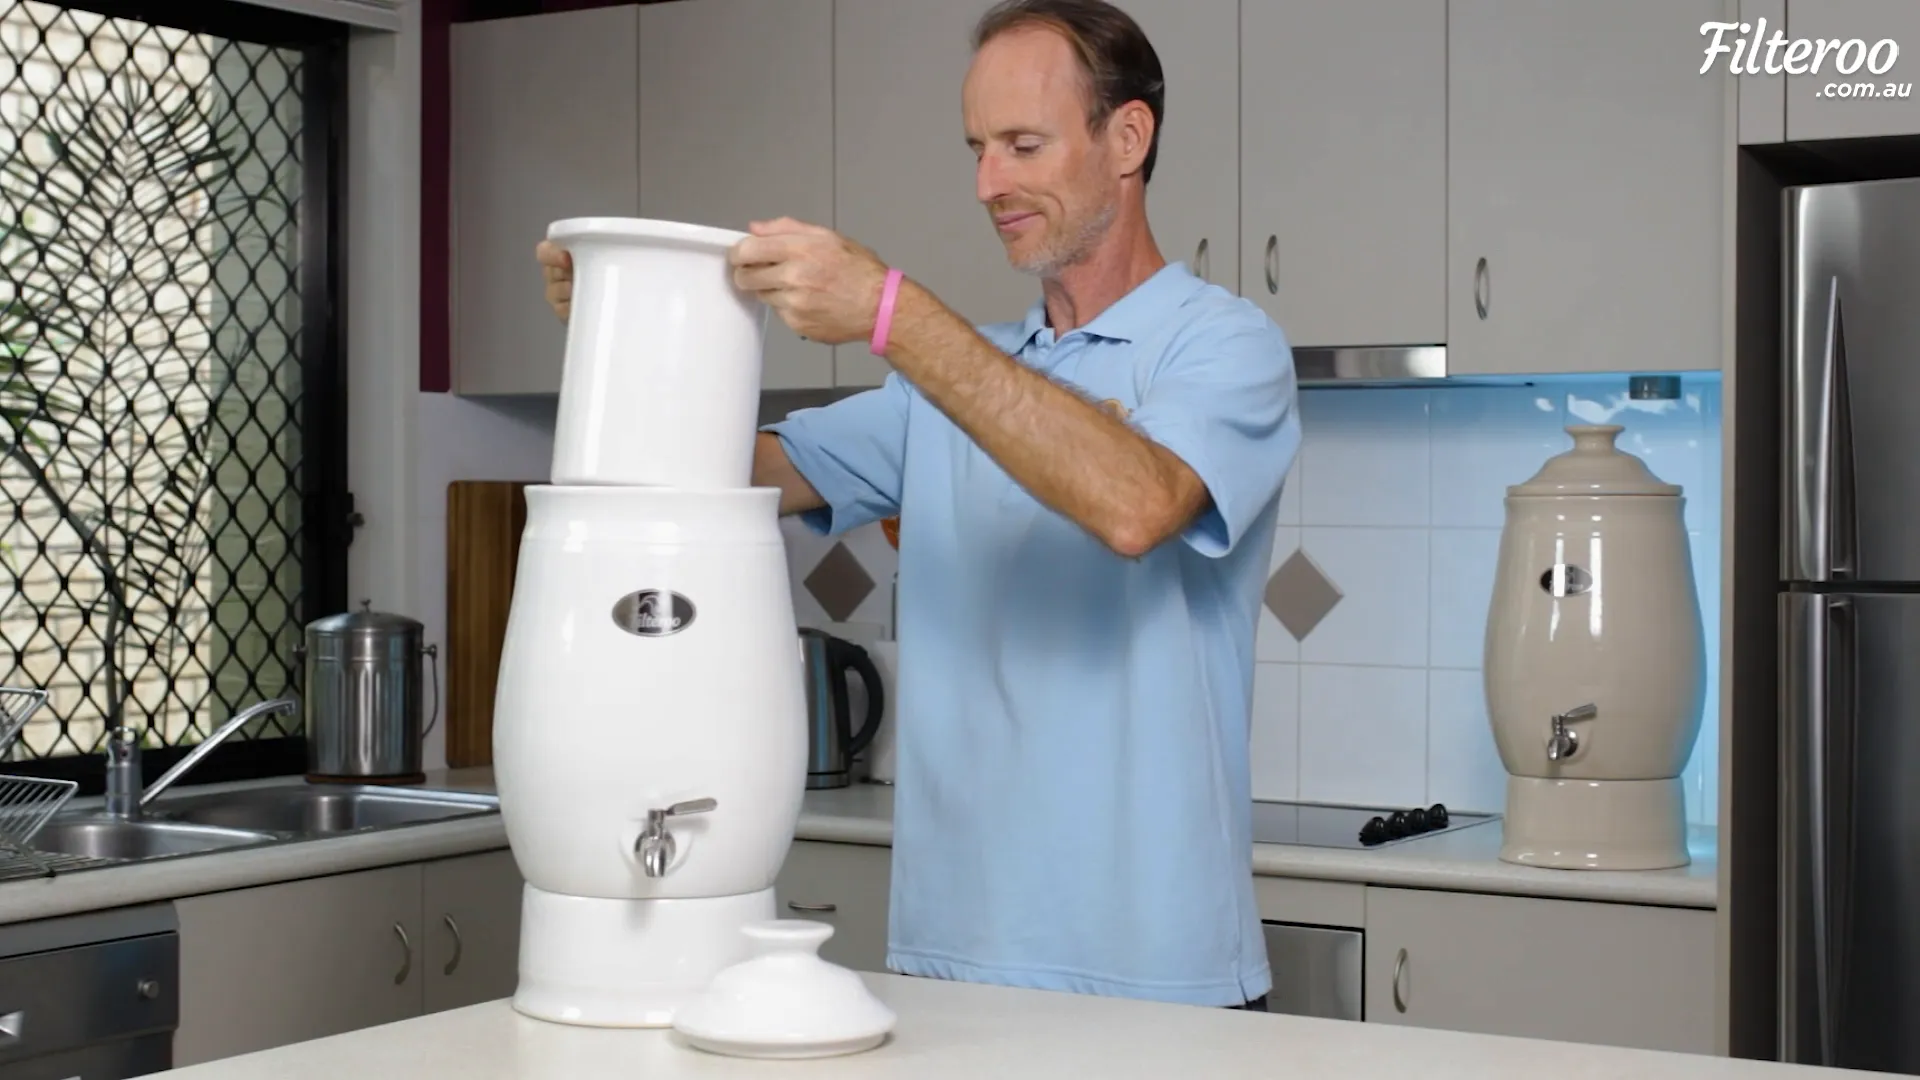
Step 4: Position the Base
Now, let’s move on to the assembly! Start by placing the base into position. Once the base is secure, sit the bottom tank on top of the base. This is the foundation of your Filteroo, so ensure it’s stable.
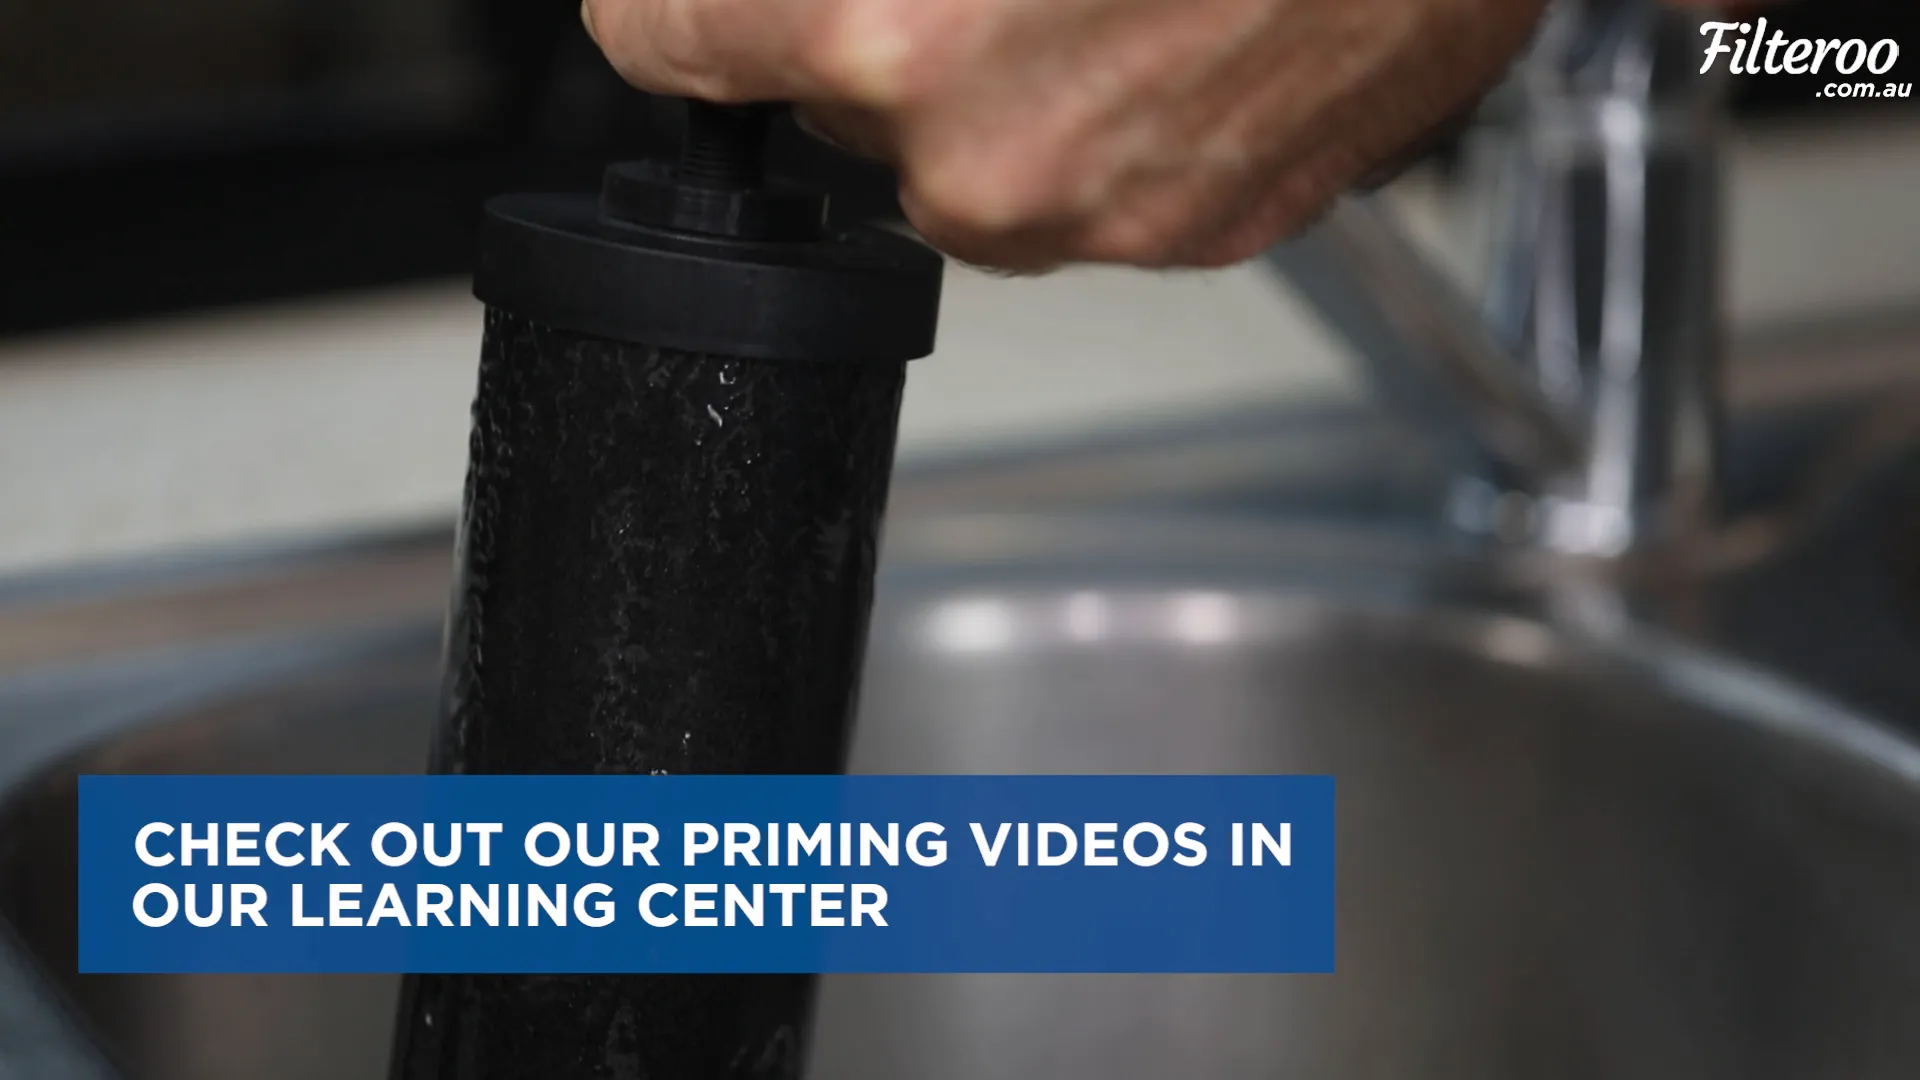
Step 5: Prime Your Cartridges
It’s time to prime your cartridges! This step is crucial for ensuring optimal performance. If you need assistance with this, check out our priming videos in our learning centre. Once your cartridges are primed, you can proceed to the next step.
Step 6: Installing the Cartridges
To install your carbon or ceramic cartridge, remove the wing nut but keep the washer on the thread. Insert the thread through the hole in the top tank from the inside out. Then, screw the wing nut back onto the underside of the top tank, but remember: do not over-tighten!

Step 7: Lower the Top Tank
Once your cartridge is installed, lower the top tank inside the bottom tank. This is a straightforward step, but make sure everything aligns properly.
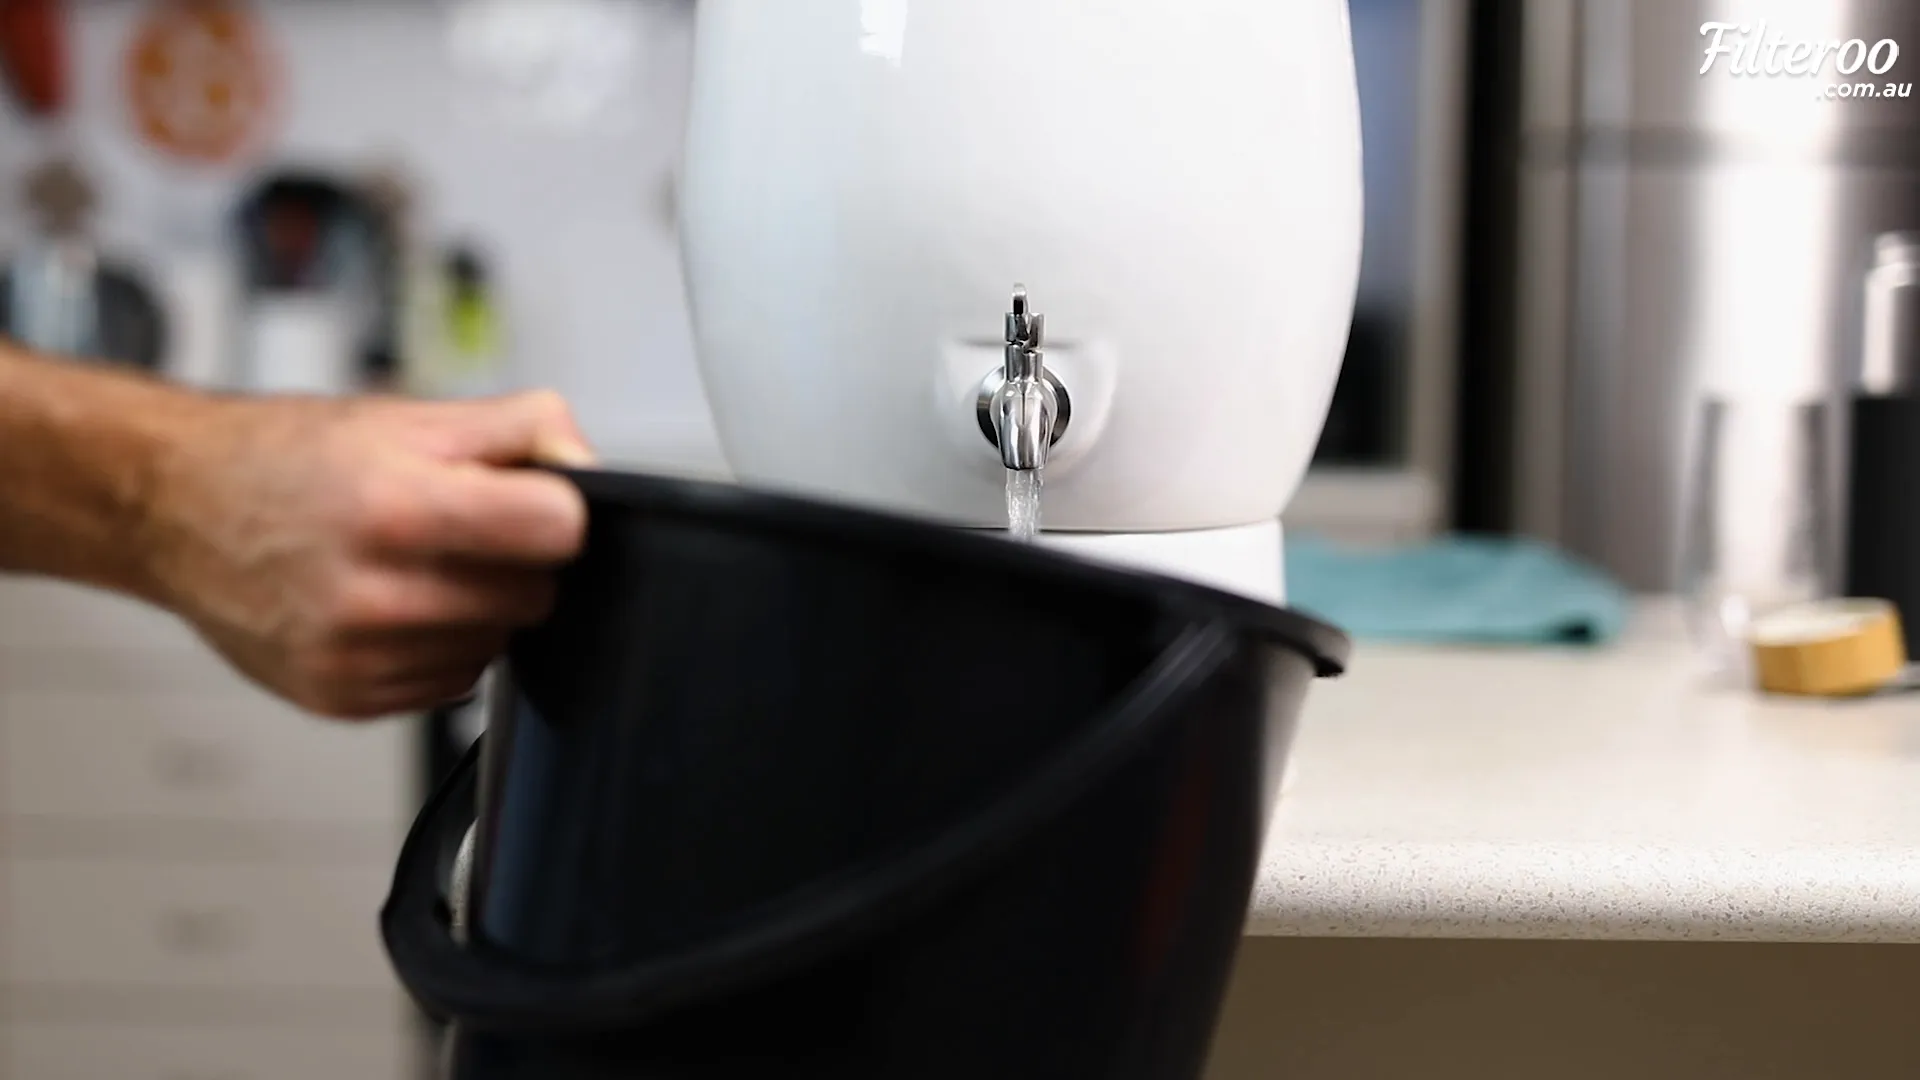
Step 8: Flushing Your Filter
Before you can enjoy your first glass of water, we recommend flushing twelve litres of water through the cartridge. This step ensures you have the best taste right from the start. As the water filters through to the bottom tank, open the tap and allow the water to empty out into a bucket or container. This water can be reused for your garden or plants!
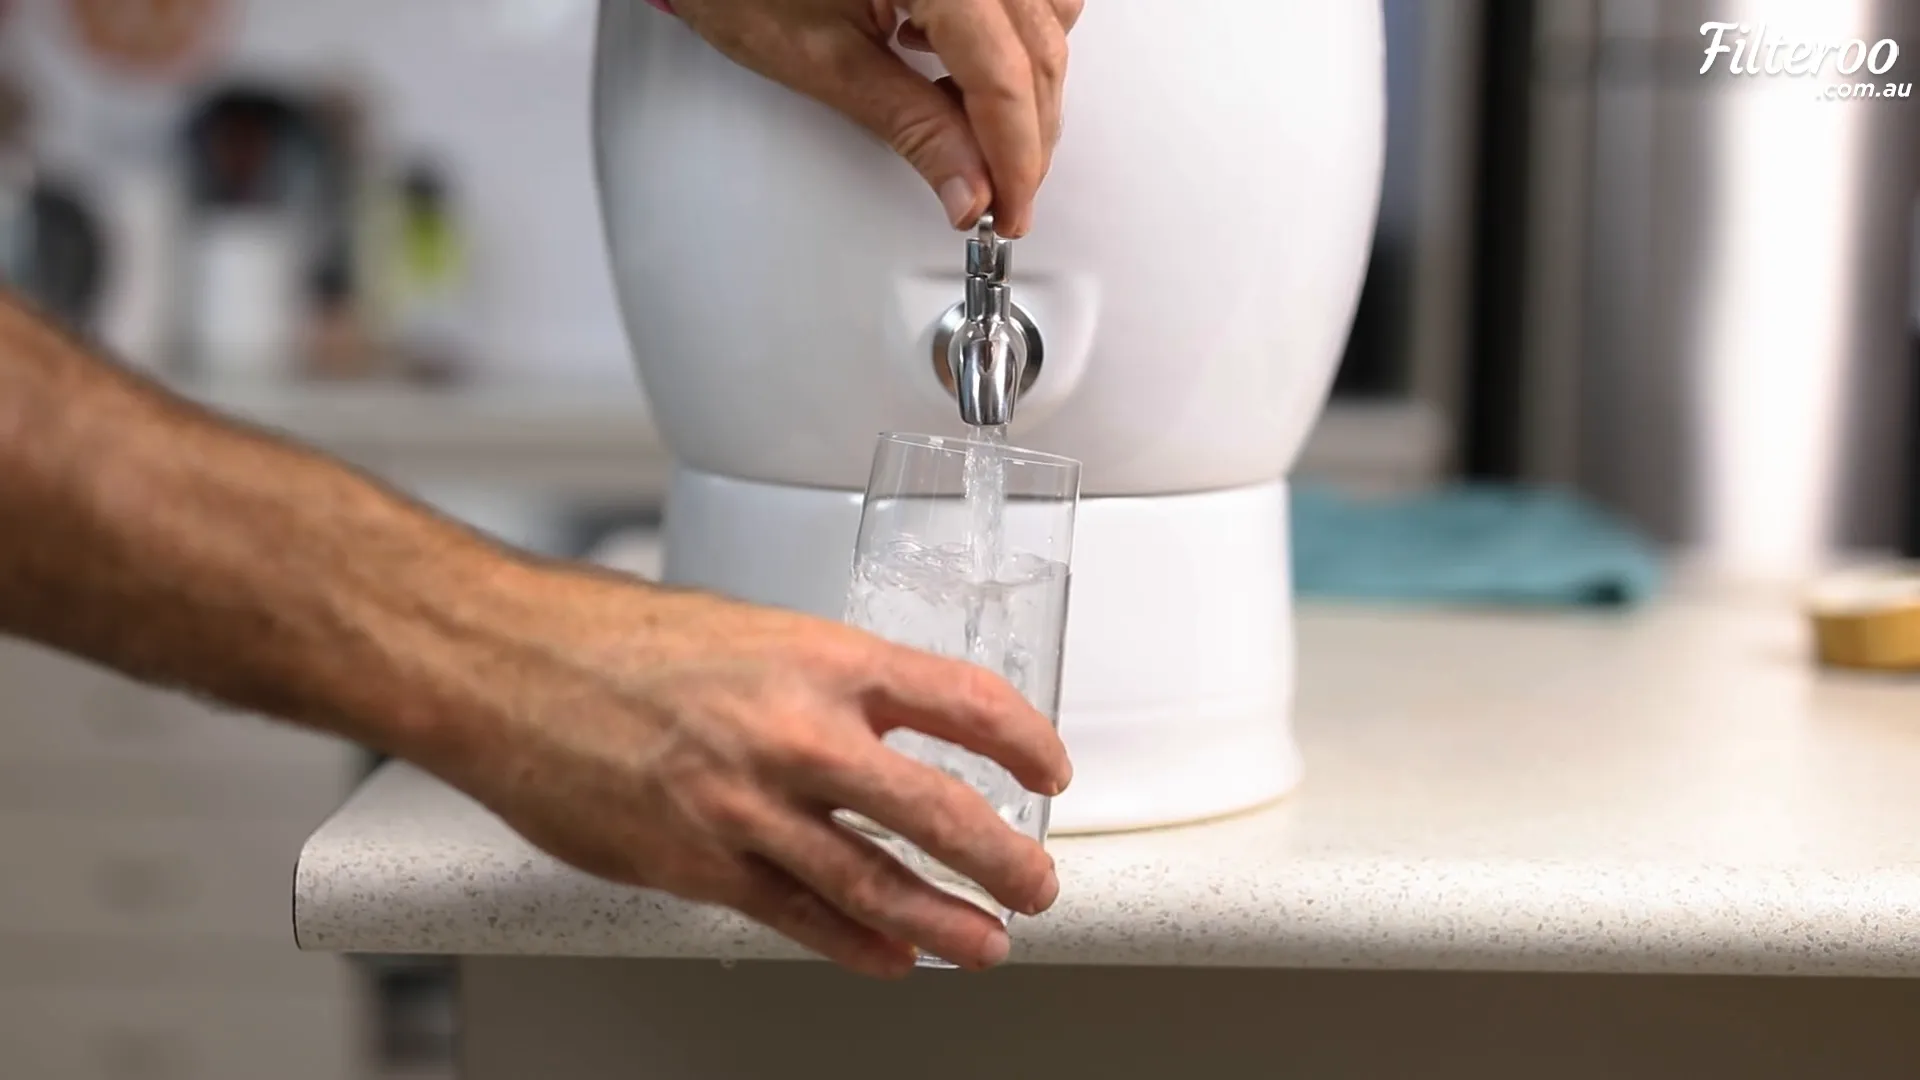
Step 9: Fill and Enjoy!
Finally, all you have to do is fill your Filteroo® to the top, put the lid back on, and voila! Your first glass of Filteroo filtered water will be ready in no time. Enjoy the fresh taste and remember to take a moment to love your water today!
Frequently Asked Questions (FAQ)
1. How often do I need to replace the cartridges?
Replacing the cartridges every 6 to 12 months is recommended, depending on your usage and water quality.
2. Can I wash the cartridges?
No, do not wash the cartridges. They are designed to filter water without being cleaned, as washing can damage them.
3. What should I do if I notice a drop in water flow?
A drop in water flow may indicate that the cartridges need to be replaced. Check the condition of your cartridges and replace them if necessary.
4. Is the Filteroo Joey suitable for all types of water?
Yes, the Filteroo Joey is designed to work effectively with various water sources, including tap water, rainwater, and more.
5. Where can I find replacement cartridges?
You can easily find replacement cartridges on our website. We recommend checking out our Filteroo® ULTRAPURE 7" All in 1 Ceramic Gravity Water Filtration Candle for your needs.
Assembling your Filteroo Joey gravity water filter is an easy and rewarding process. With clean, filtered water at your fingertips, you can enjoy a healthier lifestyle. For any further questions or assistance, don’t hesitate to reach out to us!