If you’re wondering how to change your water filter cartridges and how to pre-flush, you’re in the right place. Water filter cartridges are easy to replace and easy to flush. Be it a carbon block filter, sediment filter cartridge or even fluoride removal, there’s a process you need to follow. To create the best tasting filtered water, please follow the IMPORTANT steps below to ensure there will be no issues with your water filter.
Instructions for Systems That Use Fluoride Removal Cartridges
All fluoride removal cartridges MUST be FLUSHED with flowing water inside your water filter for 10 minutes minimum with NO other cartridges installed before use.
Note: Your fluoride removal cartridge is usually installed in positions 1 or 2 in your water filter.
-
Remove all water filtration cartridges from inside your water filter, noting the position of each cartridge.
-
Install the fluoride removal cartridge inside the water filter, with NO OTHER cartridges installed after the fluoride removal cartridge.
-
Turn on the water and let water flow through the water filter to flush the fluoride removal cartridge for at least 10 minutes. (This water can be collected for plants if so desired).
-
After flushing water through the fluoride removal cartridge for 10 minutes minimum, turn off the water supply then turn on the drinking water filter faucet to release any water pressure.
-
Remove the housings for any other cartridges you need to install. Install these cartridges in the same order and positions they were removed from. (See cartridge images included if required).
-
Tighten all housings, turn the water supply back on and check for any leaks.
-
Turn on the water filter faucet and flush the full system for a further 5 minutes with ALL cartridges installed.
After following all the steps above, you may now use your water filter.
Instructions for Systems That Do Not Use Fluoride Removal Cartridges
- Install ALL replacement cartridges in your water filter in the same order and positions they were removed from. (See cartridge images included if required).
- Turn on the water and flow the water through the water filter, flushing all the cartridges simultaneously for at least 5 to 10 minutes minimum. (This water can be collected for plants if so desired).
Note 1: All water filtration cartridges require flushing in some way. Fluoride removal cartridges MUST be flushed separately on their own, with NO other cartridges installed when new for a minimum of 10 minutes.
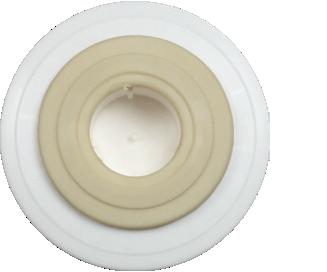
Note 2: Some cartridges say THIS WAY UP, this is for under sink water filter systems. For benchtop water filter systems, ENSURE the THIS WAY UP printed on the cartridge goes down into the base of the benchtop water filter head cap. The washer end of the cartridges goes into the head caps.
CARTRIDGE IDENTIFICATION

Polyspun Sediment Cartridge

Pleated Sediment Cartridge

String Wound Sediment Cartridge

Fluoride Removal Cartridge

Fluoride Removal Cartridge (Bottom)

Fluoride Removal Cartridge (top ring around washer)

Low Alkaline Cartridge

Low Alkaline Cartridge (Bottom)

Low Alkaline Cartridge (top smooth flat washer)

High Alkaline Cartridge

High Alkaline Cartridge (Bottom)

High Alkaline Cartridge (Top)

Thread and Washer 10" Aragon Cartridge

10” Standard Aragon Cartridge

Doulton Cartridge

Carbon Block Cartridge
CARTRIDGE POSITION GUIDE
Please note: Below are the Aragon water filter system listings. The same applies to Coldstream, Doulton and/or Carbon water filter systems.
Just replace the Aragon cartridge with whatever filtration cartridge (Coldstream, Doulton or Carbon) you are using in these positions and flush as described.
ULTRAPURE Aragon 10” Single Stage System
- is 1 x Aragon cartridge only
- install & flush 5 to 10 minutes
• Benchtop: https://mywaterfilter.com.au/products/ultrapure-benchtop-aragon
• Undersink: https://mywaterfilter.com.au/products/ultrapure-under-sink-aragon
ULTRAPURE Aragon 10” Twin Water Filter System with Sediment Protection
- sediment cartridge then Aragon cartridge
- install & flush for 5 to 10 minutes
• Benchtop: https://mywaterfilter.com.au/products/ultrapure-benchtop-aragon-sediment
• Undersink: https://mywaterfilter.com.au/products/ultrapure-under-sink-aragon-sediment
ULTRAPURE Aragon 10” Twin Water Filter System with Fluoride Removal
- fluoride removal cartridge then Aragon cartridge
- flush fluoride removal cartridge on its own 10 minutes
- see the special flushing instructions above
• Benchtop: https://mywaterfilter.com.au/products/ultrapure-benchtop-aragon-fluoride
• Undersink: https://mywaterfilter.com.au/products/ultrapure-under-sink-aragon-fluoride
ULTRAPURE Aragon 10” Twin Water Filter System with Low Alkaline
- Aragon cartridge then Low Alkaline cartridge
- install & flush 5 to 10 minutes
Note: Please contact Sales at 02 5500 5310 if you're interested to avail the low alkaline system.
ULTRAPURE Aragon 10” Twin Water Filter System with Alkaline
- Aragon cartridge then Alkaliser cartridge
- install & flush for 5 to 10 minutes
• Benchtop: https://mywaterfilter.com.au/products/ultrapure-benchtop-aragon-alkaline
• Undersink: https://mywaterfilter.com.au/products/ultrapure-under-sink-aragon-alkaline
ULTRAPURE Aragon 10” Triple Water Filter System with Fluoride Removal & Sediment Protection
- sediment cartridge then fluoride removal cartridge, then the Aragon cartridge
- flush the sediment cartridge & fluoride removal cartridges together on own 10 minutes
- see the special flushing instructions above
• Benchtop: https://mywaterfilter.com.au/products/ultrapure-benchtop-aragon-fluoride-sediment
• Undersink: https://mywaterfilter.com.au/products/ultrapure-under-sink-aragon-fluoride-sediment
ULTRAPURE Aragon 10” Triple Water Filter System with Low Alkaline & Sediment Protection
- sediment cartridge then Aragon cartridge then Low Alkaline cartridge
- install all cartridges & flush for 5 to 10 minutes
ULTRAPURE Aragon 10” Triple Water Filter System with Alkaline & Sediment Protection
- sediment cartridge then Aragon cartridge then the Alkaliser cartridge
- install all cartridges & flush for 5 to 10 minutes
• Benchtop: https://mywaterfilter.com.au/products/ultrapure-benchtop-aragon-alkaline-sediment
• Undersink: https://mywaterfilter.com.au/products/ultrapure-under-sink-aragon-alkaline-sediment
ULTRAPURE Aragon 10” Triple Water Filter System with Fluoride Removal & Alkaline
- fluoride removal cartridge then Aragon cartridge then Alkaliser cartridge
- flush the fluoride removal cartridge on its own for 10 minutes
- see the special flushing instructions above
• Benchtop: https://mywaterfilter.com.au/products/ultrapure-benchtop-aragon-fluoride-alkaline
• Undersink: https://mywaterfilter.com.au/products/ultrapure-under-sink-aragon-fluoride-alkaline
INSTALLING CARTRIDGE POSITIONS - Undersink Systems
Look at the new cartridge and check if it has an inscription called THIS WAY UP. Be aware that THIS WAY UP must face up into the spigot (water filter head cap) for the under sink water filter system. If there is no THIS WAY UP on the cartridge, install the washer end of the cartridge up into the head cap.
INSTALLING CARTRIDGE POSITIONS - Benchtop Systems
Look at the new cartridge and check if it has an inscription that says THIS WAY UP. Be aware that THIS WAY UP must face DOWN into the spigot (water filter head cap) for the benchtop water filter system. If there is no THIS WAY UP on the cartridge, install the washer end of the cartridge down into the head cap. THIS WAY UP for a benchtop water filter means the up direction must go down into the head cap of the water filter, or the water will not flow.
If you have any questions or require help with your replacement cartridges, please contact us.
The most critical rule is that new fluoride removal cartridges MUST be flushed on their own for a minimum of 10 minutes before any other cartridges are installed after them in the system.
For all other systems that do not contain a fluoride removal cartridge, the process is simpler: install all the new cartridges into their correct positions at once, and then flush the entire system together for 5 to 10 minutes.
Pay close attention to the physical installation of the cartridges: for undersink systems, the "THIS WAY UP" label faces UP into the filter head, while for benchtop systems, the "THIS WAY UP" label must face DOWN into the filter head to ensure correct water flow.
Hear From Our Satisfied Customers
Why Do I Need to Flush New Water Filter Cartridges?
Flushing is an essential first step for any new cartridge. It serves to wash out any harmless fine particles (like carbon dust or manufacturing residue) that might be inside. This process ensures your water is clear, tastes great from the first glass and prevents this dust from clogging up other parts of your system.
Why Does the Fluoride Removal Cartridge Have Its Own Special Flushing Rule?
Fluoride removal cartridges contain a special media that needs to be properly rinsed and activated before it can work effectively. Flushing it completely on its own for at least 10 minutes ensures this media is prepared and prevents any fine particles from the new fluoride cartridge from being pushed into, and potentially clogging, the other new cartridges in your system.
What Happens if I Forget to Flush My New Cartridges?
If you forget, you'll likely notice cloudy water or little black specks in your glass, which is just harmless carbon dust. While it's not dangerous, it's not pleasant. If you forgot to flush a fluoride cartridge separately, you might also reduce the lifespan and performance of the cartridges installed after it. It's always best to take them out and follow the flushing steps correctly for the best results.


![How to Change the Cartridges in your Whole House Water Filter [VIDEO]](https://cdn.shopify.com/s/files/1/0455/8071/4143/files/9c3b9e873f8462203b6e2867ac286578_600x_33f9f34c-0521-4d83-98e3-4a9ffa244c1b_550x.jpg?v=1750125154)
