In this blog, we're going to discuss how to install an under sink reverse osmosis system. Reverse osmosis (RO) systems are very popular water filter systems, and they come in a variety of styles. The HPF 7 Stage, HPF 5 Stage and HPF 4 Stage are all different in appearance, but they are all the same when it comes to installation. There are a couple of ways to get the installation done.
Table of Contents
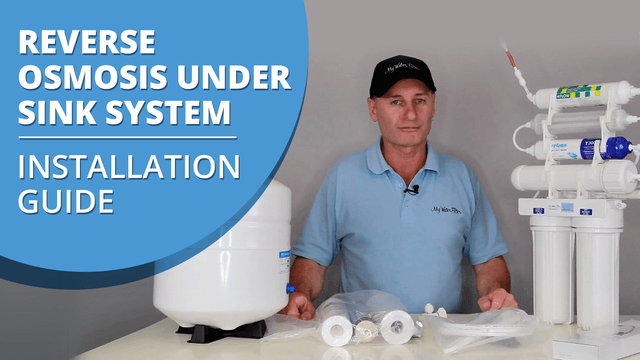
In this video, discover how easy it is to install a reverse osmosis system under your sink! Whether you're tackling the job yourself or hiring a plumber, we guide you through the steps for a seamless installation, so you can enjoy clean, purified water in no time.
Learn about the essential components, tips for space management and how to flush the system for optimal performance. Ready to improve your water quality? Let’s get started!
Get a Plumber to Install Your Reverse Osmosis System
Use your own plumber or hire one that is in your area to work on the installation for you. It will take about 1-2 hours, and after that, you should be good to go.
Because it's an under sink system, the plumber may need to drill through the benchtop to install the faucet. If you have a stone benchtop, then they may charge you extra for that.
The Hardest Part of Installing it Yourself
If you can get a drill and drill through the top of the stainless steel sink to install the faucet, that might be a challenging task for you.
Reading the instruction manual will take you through the whole process. To find your installation manual, search for your product in the search bar above and you will find the installation manual on the “Installation” tab on the product page.
We also send a copy of this out via email when you purchase your reverse osmosis water filter through My Water Filter.
My Water Filter Reverse Osmosis Systems
All our reverse osmosis water filters come as a complete system. They come with everything that you need to install except the tools. You don’t need to purchase anything else to complete the installation. We provide all you need and the best service we can and get everything to you in one go.
If you're going to get an RO system, make sure you've got enough room. To see how big they are, you can see the size on the product page of our website.
How to Install the Under Sink Kit for a Reverse Osmosis Water Filter System
Steps to install an RO system:
- The first step is to turn off your home’s water mains. Go underneath your sink and undo the flexible chrome pipe that connects to your kitchen tap.
- The T-piece is what allows water to go to both your water filter and your kitchen sink.

- Connect the flexible chrome pipe back to the main water line.
- Use the white tubing to feed water to the water filter.
Installing the Water Filter Housing
The water filter housing comes in two parts usually — the bracket with large cartridges hanging down vertically and the inline cartridges that clip on above the bracket.
Screw the housing bracket into the wall inside your cupboard. Ensure you leave about 3cm below the bottom of the water filter houses so you can screw the housings on and off.
The inline cartridges can be clipped on and off as necessary, so if you don’t have much room in your cupboard, you can remove the inline filters on top and lay them down so the water filter can fit.

The Cartridges

When you receive your RO system, you will have to install the drop-in cartridges into the housings below the bracket.
Install the sediment in the first position where the water comes in and the carbon block in the second position.
The RO Membrane
The RO membrane has a unique housing that has its own housing removal tool. Undo the RO membrane housing with the tool and install the membrane.
Installing the Tank
Most RO systems have a 12-litre tank. The tank can be installed any way to fit into your cupboard. If it's too tall, the tank can just sit on its side if that helps.
When you receive your water filter, you will get a bag of goodies. This bag will have all the small parts in it, and in it, you will find the tank tap.

This tap is screwed straight on top of the water tank. The pipe that you use will push it directly into this tap, which will connect to the tank and the water filter.
Once the water goes into the tank, it'll come back along that same water line, so there's only one water line to and from the tank.
RO Water Filter Waste Water Setup
The membrane splits the water into pure water and wastewater. When you turn it on, it starts making water, and the pure water will go into the tank. At the same time, we'll have about the same amount of water go down the drain.
Install the wastewater clamp to a pipe that goes down the drain. You will have to drill a hole in the pipe, so the wastewater coming from your water filter will go down the drain through the wastewater clamp.
Attach the wastewater tubing from the RO membrane to the clamp, and your wastewater component will be set up.
Connect the RO System to the Faucet
Once the water has passed through all the cartridges, there will be tubing to take that water to the faucet. Connect that tube to the bottom of the faucet underneath the sink.
Reverse Osmosis Flow Rate
The RO systems make water slowly. It'll make water about 200ml per minute, depending on the pressure you've got in your home and the water quality.
When you get it all set up and you turn this system on, you'll start to see the water dripping from the faucet.
It'll flow at 200ml per minute. You might think that's a terrible flow rate, but that is normal for RO systems to be effective.
Flushing the Cartridges
Once you have installed your water filter, you will want to flush the cartridges. This is normal for all water filters to remove any fines from the cartridges.
Turn the tap on to push water through your RO system for about three hours. Due to the filtration speed, it will take about this long for the water to flow through the cartridges enough to give them a good flush.
It’s good to fill the tank three times or 36 litres. Each tank flush will take about an hour. When it’s full, turn the faucet on and drop that water down the sink.
After three times, you can now taste your new filtered water.
Please watch the video for more information, and if we can help you out with anything, please let us know.
Installing other varieties of RO Systems
RO systems come in different shapes and sizes, but they all share the same installation process.
Get a plumber or do it by yourself and you will have your water filter up and running for you and your family in no time.
Thank you very much for trusting us with your filtration needs. If you have any questions, please contact us. We'd be delighted to help.
This guide provides a comprehensive overview for installing an under sink reverse osmosis (RO) system, a task which can either be performed by a plumber in 1-2 hours or as a DIY project, where the main challenge is often drilling a hole for the dedicated faucet.
It walks through the key installation steps, which include fitting a T-piece to the main water line, mounting the filter housing, installing the various cartridges and the membrane, connecting the storage tank (which can be laid on its side) and setting up the wastewater clamp on the drainpipe.
The guide also explains that RO systems produce water slowly and highlights the vital post-installation flushing process: you must fill and completely empty the storage tank three times (which can take about three hours in total) to properly flush the new cartridges and membrane before drinking the water.
Hear from Our Satisfied Customers
I've Just Installed My System and the Water Is Only Dripping Out of the New Tap. Is It Broken?
No, this is completely normal! Reverse osmosis systems purify water very slowly (around 200ml per minute). The system's job is to gradually fill the storage tank with pure water. Once the tank has water in it, you will get a strong, steady flow from your faucet when you turn it on. The slow drip is just the sound of the system refilling the tank.
I Don't Have Much Room Under My Sink. Does the Storage Tank Have to Stand Upright?
Not at all. The storage tank is very versatile and can be installed any way that helps it fit into your cupboard space, including being laid on its side.
Do I Need to Buy Any Extra Pipes or Fittings to Install the System?
No. All our reverse osmosis water filters are sold as a complete system with everything you need for a standard installation (T-piece, tubing, faucet, tank, etc.). The only things you'll need to provide are your own basic tools like a drill and a wrench.

![How to change the Cartridges in your Undersink Water Filter [VIDEO]](https://cdn.shopify.com/s/files/1/0455/8071/4143/files/3734aa5643fff854a0db419b6c17370b_600x_1efbdbaa-f8bd-40ab-a41a-9415bb535ea9_550x.jpg?v=1750402915)